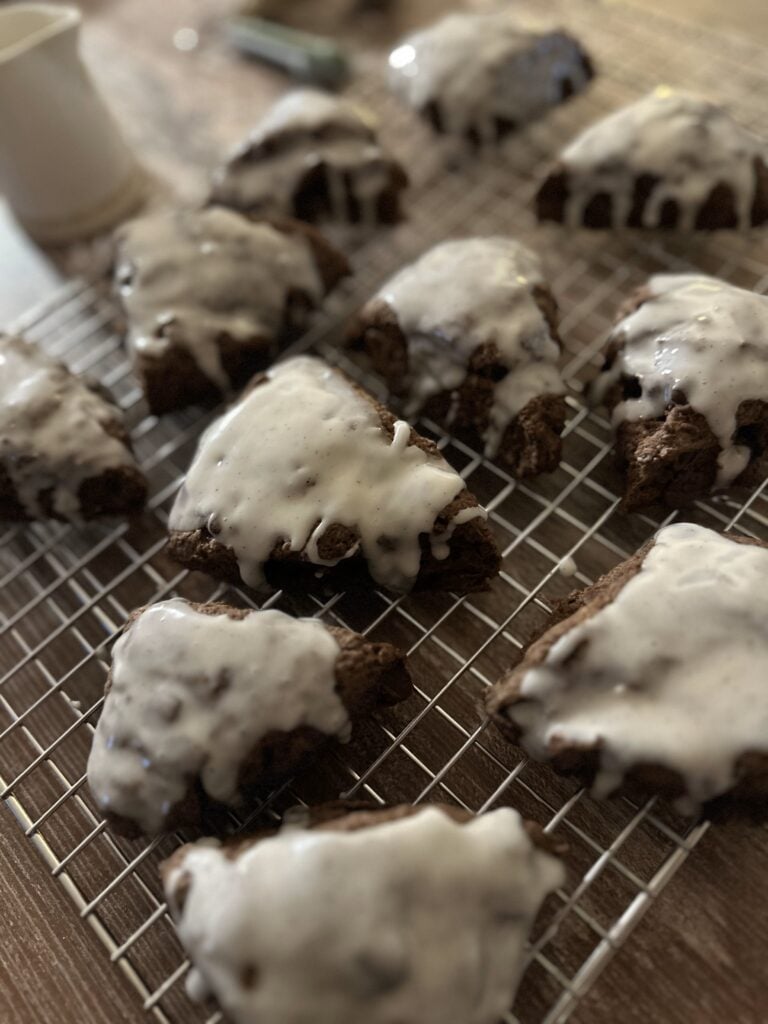
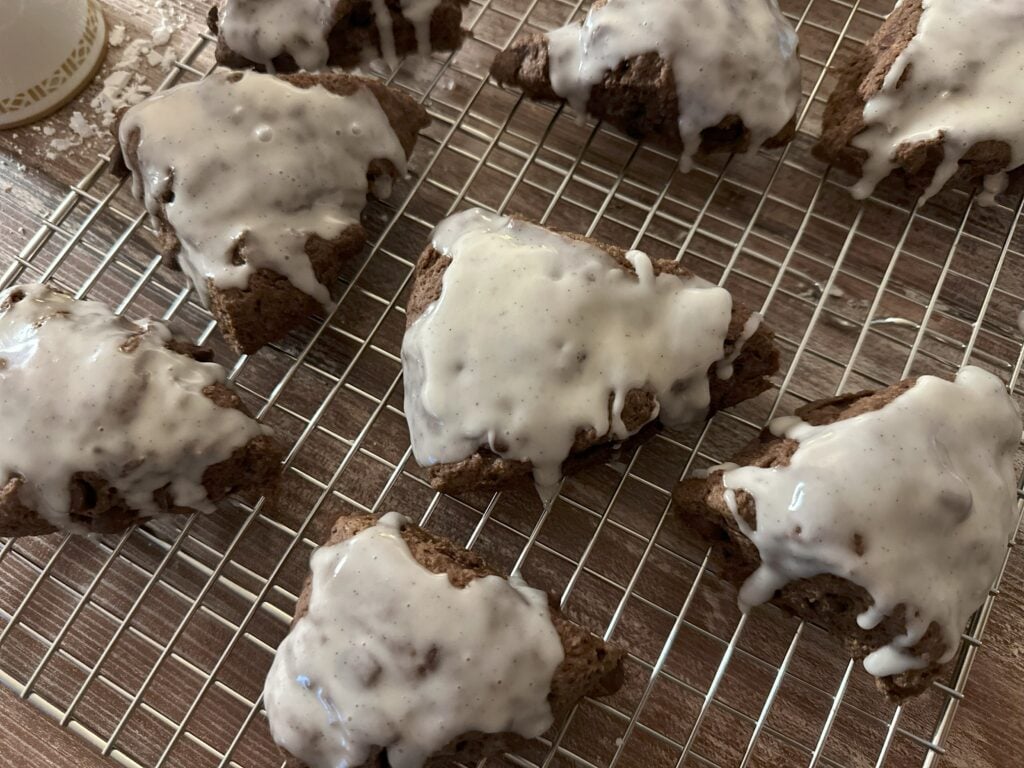
Easy Chocolate Cardamom Scones with a Vanilla Bean Glaze
The fall vibes are strong with this recipe. The warm flavors of chocolate and cardamom pair perfectly together, and the simple vanilla bean glaze adds a sweet touch. I can smell them already!
You guys, these scones taste just like a brownie! (I do have a delicious, Easy One Bowl Brownie you might be interested in trying.) They are so good! I decided to add chocolate chips to this recipe, and they did not disappoint. The cardamom adds that extra level of something. If you didn’t know it was in there, you might not know exactly what it is, but you would definitely taste something, ‘extra’. And they smell so divine! Chocolate and cardamom has got to be my new favorite flavor pairing.
Scones are some of my favorite treats. They are so easy to make and you can put almost anything in them. They can be sweet (like my Orange Ginger Scones), they can be savory (like my Cheese and Bacon Scones), they can be plain (like my Vanilla Scones), you can top them with jam, cream, glaze, cheese, whatever you can think of. Look in your cupboards-whatever you have in there, you could probably put it in a scone. They make a perfect breakfast or snack, heck, if you make a savory one, they could even be a dinner in a pinch. Did I mention I love scones?
What’s the difference between scones and biscuits?
Although scones do have flaky layers, they should not flake like a biscuit. A biscuit is lighter than a scone, and less crumbly. A scone will be drier than a biscuit, yet not dry at all, if that makes sense. They will be denser than a biscuit, but still moist. Both are delicious, yet have their own merits. Biscuits tend to be more savory, especially when used to sop up delicious sausage gravy. Scones can be enjoyed sweet or savory. Sweet scones are definitely enjoyable topped with jam, butter, or honey and a cup of coffee.
Tips for baking perfect scones
Ingredients

This is an overview of the main ingredients. For a full list, please see the recipe card below.
- All-purpose flour– provides the base of the recipe. All-purpose flour is perfect for this recipe.
- Butter– COLD butter is imperative for those flaky layers.
- Chocolate and cardamom– the flavor base of these scones. The warm, earthy flavor of cardamom pairs perfectly with the intense chocolate flavor.
- Greek yogurt, egg, and milk– These three provide the moisture and binding for the scones. Plus, the slight tanginess of the Greek yogurt goes really well with these scones. These ingredients must be cold as well.
Why I love these scones (and so will you)
How to Make Chocolate Cardamom Scones
Scones are so easy to throw together, it’s one of the reasons I love making them so much. They don’t take much time to make, either. I first like to start with cubing the butter into small cubes. Once I cube it, I pop it in the freezer while I prepare everything else. You can also shred the butter with a cheese grater if you would like.
Next, I add the dry ingredients together in a large mixing bowl. I do like to sift the cardamom and baking powder into the other dry ingredients. It helps to break the lumps apart. It’s not strictly necessary, so if you skip this step, your scones will still turn out fine. Once I’ve whisked all the dry ingredients together, I then whisk the wet ingredients together. First, I’ll whisk the egg by itself to help break apart the yolk. Then I’ll add the milk and yogurt and whisk everything together until fully incorporated.


Next, you’ll cut the butter into the dry ingredients with a pastry cutter until it resembles pea gravel. Add the wet ingredients to the dry ingredients and mix with a spoon. You’ll notice the mixture starting to get crumbly. At this point, I like to work the dough with my hands until I can form a ball with it. It may seem a bit dry, but as you keep working it, it will start to come together. If you need to, add more milk 1 tablespoon at a time. I haven’t needed more than 4 tablespoons for these scones. It’s ok if the dough is a bit tacky, you don’t want it to be too wet though.


Once you have formed the dough ball, flatten it with your hands, fold it in half, and repeat this process 2-3 times. Then, reform the dough ball again and cut it in half with a knife. Form these two halves into dough balls. On your prepared baking sheet, flatten each dough ball out into a roughly six inch dish about 1 inch thick. Slice the scones into six pieces each, as equal as you can. Slide the slices about 1 inch away from each other, giving the scones room to bake up without touching each other. This helps them bake more evenly.
Pop the scones in the refrigerator for 20 minutes and preheat the oven to 400 F. I like to cleanup while I’m waiting for the even to heat up. After the scones have chilled for 20 minutes, put them in the oven and bake for 20 minutes. You won’t be able to see if these scones have turned a nice golden brown color, but they will look fluffy and have a deep chocolate color when they are done. 20 minutes has always yielded me with nice, fluffy, tasty scones.
Prepare the Glaze
While the scones are baking, prepare the vanilla bean glaze. I made a bigger batch of my glaze than I usually do since I wanted to cover more of the scone with glaze. You can make as much or as little as you want to though. The glaze is made of a few, simple ingredients. Powdered sugar, milk/heavy cream, and vanilla bean paste.
More Chocolate Recipes
- Ultimate Triple Chocolate Scones
- One Bowl Chocolate Peanut Butter
- Chocolate Hazelnut Blondies
- Easy Double Chocolate Mini Bundt Cakes
Frequently Asked Questions
COLD butter. And cold milk and sour cream/yogurt. When the cold ingredients hit the oven, they release steam as they bake, helping to creating those flaky layers. It’s also important not to overmix the dough. Mix it just until it comes together, especially when it comes to forming to dough ball and laminating it. We only want to handle it just as much as we need to. Remember to chill them after forming them and before baking them. This ensures the butter is cold when it goes into the oven.
First off, scones are more dense than a biscuit, for example, but they should still have a lightness about them but also have a bit of weight, if that makes sense. It’s best to avoid using the food processor to make your scones as this can result in overworking the dough. Overworked dough will produce scones that are too dense and dry. I mix the dough with a spatula until it looks like a shaggy mess. Then I get in there with my hands to bring everything together into a dough ball. The key is NOT to overwork the dough.
Store scones in an airtight container in the fridge for up to 5 days. They can also be stored in an airtight container on the counter for 3 days.
Yes, they freeze great. Before baking, I would flatten the discs, then wrap in plastic wrap and tinfoil and add to a freezer safe container for up to 3 months. Likewise, you can freeze the scones after you have cut them into triangles. Lay them flat on a tray and freeze them solid. Then, add them to a freezer safe container to be used when you only feel like baking one scone.

Chocolate Cardamom Scones
Ingredients
- 2 cups all-purpose flour
- 8 tablespoons unsalted butter, COLD
- 1/4 cup natural cocoa powder
- 1 egg
- 1/4 cup granulated sugar
- 1 tablespoon baking powder
- 1/2 cup Greek yogurt or sour cream
- 4 tablespoons milk
- 1 teaspoon cardamom, ground
- 1/4 teaspoon salt
Vanilla Bean Drizzle
- 1 1/2 cups powdered sugar
- 2 tablespoons heavy cream or whole milk
- 3 teaspoons vanilla bean paste or extract
Instructions
- Line a large baking tray with either parchment paper or a silicone mat.
- Cube the butter and set it in the freezer while you prepare the rest of the ingredients. Alternatively, you could grate the butter with a cheese grater.
- Whisk the dry ingredients together: 2 cups ap flour; 1/4 cup cocoa flour; 1/4 cup sugar; 1 tablespoon baking powder; 1 teaspoon cardamom; 1/4 teaspoon salt.
- Whisk the wet ingredients together: 1 egg; 1/2 cup Greek yogurt; 4 tablespoons milk.
- Cut the butter into the dry ingredients using a pastry cutter until it resembles pea gravel. If you don't have a pastry cutter, you can use your fingers to work the butter into the flour.
- Pour the wet ingredients into the dry ingredients. Mix together until it starts to look shaggy. At this point, you can start to form the dough ball with your hands. As you form the ball, you'll notice that some of the mixture falls away. Work this into the ball as best you can.
- Once you have formed the dough ball, I like to do a bit of laminating. I'll flatten the ball down, fold it over, then flatten again. Do this three times and then form it back into a ball. Slice this larger ball in half and form the two halves into smaller balls.
- On your prepared pan, flatten each of the smaller dough balls into roughly six-inch disks, keeping them as circular as possible. Once you have these formed, cut the circles into six triangles. Don't worry if they are not equal pieces. Pull them apart about 1 inch so the sides will bake up nicely. If you want softer sides, you can leave the scones close together.
- Stick the tray with the scones into the refrigerator for 20 minutes. Preheat the oven to 350. Once the scones have chilled for 20 minutes, bake them for 20 minutes. You won't be able to see if they are golden brown, but they won't look shiny anymore. They will have more of a matte finish to them.
- While the scones are cooling down, go ahead and mix the glaze. Because I wanted to cover these scones a bit more in glaze, I made a double batch. In a small mixing bowl, mix together 1 1/2 cups powdered sugar, 2 tablespoons of heavy cream or whole milk, and 3 teaspoons of vanilla bean paste or extract. You may find that you need to add a bit more heavy cream if the glaze seems a bit thick. Don't add too much extra at once; you don't want it to be too thin. We want the glaze to pour out like honey to cover the scone and not have it fall off the scone too much. WAIT UNTIL THE SCONES ARE COMPLETELY COOLED OFF BEFORE ADDING THE GLAZE. If the scones are too hot, the glaze will melt away.
- Enjoy your scones with a cup of coffee for breakfast, or just as a snack. Or some nights, even dinner. I won't judge.
Notes
- Store scones in an airtight container in the fridge for up to 5 days, or in a container on the counter for 3 days.
- If using salted butter, omit the salt from the recipe.
- You can choose to either cube the butter or use a box shredder and shred it.
- To freeze scones, wait until the scones are cooled down completely. Wrap them in plastic wrap, then foil, and store them in a freezer-safe container for up to 3 months.
- To freeze before baking, make the scones all the way through slicing the scones. Freeze flat on a tray, then wrap individually in plastic wrap and tinfoil and store in a freezer-safe container. Freeze for up to 3 months. If you want to freeze the discs, wrap them in plastic wrap then tinfoil before freezing as well. Thaw out overnight in the fridge before slicing into triangles. When you’re ready to bake them, if baking from frozen, bake at the regular temperature and add 1-2 minutes to the baking time. You can also thaw them out in the fridge overnight and bake at the regular time and temperature.