Cinnamon Chip Scones with Vanilla Glaze
Sweet cinnamon flavor paired with the warm, slightly spicy notes of clove, dotted with cinnamon chips throughout. A vanilla icing is the perfect touch to these scones. They come together quickly, making them the perfect choice for a lazy Saturday afternoon brunch, or anytime you need something quick and delicious.

These scones are definitely for cinnamon lovers. The sweet cinnamon chips paired with ground cinnamon give these scones that wonderful cinnamon flavor that goes so well with your morning coffee. It seems like everything goes with your morning coffee. And why not? There are so many delicious baked goods out there, and so much delicious coffee! For another delicious cinnamon flavored treat, try my One Rise Maple Cinnamon Rolls. You’ll also really like my Apple Cinnamon Scones with Maple Glaze and my Easy Pumpkin Cinnamon Chip Scones.
Ingredients

- Flour All-purpose works best in this recipe.
- Butter Unsalted, if you only have salted, reduce the amount of salt in the recipe by half.
- Egg
- Sugar
- Baking powder Provides lift for the scones.
- Greek yogurt Adds moisture and a bit of tanginess.
- Milk Ads moisture.
- Vanilla extract
- Cloves I love adding cloves to baked goods. People don’t always expect it. It adds warmth and depth of flavor.
- Cinnamon Chips Cinnamon chips add delicious sweet cinnamon flavor.
- Ground cinnamon For even more delicious cinnamon flavor.
- Salt Brings out all of the flavors.
- Vanilla Glaze A simple glaze made from powdered sugar, milk, and vanilla extract.
Tips to Make the Best Scones
The first tip is to make sure the butter is COLD! This is the most important tip. The cold butter in the scones creates steam once it hits the oven, creating those flaky layers we love. The egg, cream, and yogurt should be cold as well, so wait to take them out of the fridge until right before you need them.
The next tip is to not over mix the dough. If overmixed, it will make it tough. You want to mix it just enough where it comes together and looks crumbly. From there, you’ll want to use your hands to form the dough ball.
How to Make These Scones
The most important thing to remember about making these scones is that the butter has to be VERY COLD. I put it in the freezer about 30 minutes before I am going to make them. Cube the butter into small pieces, then place back into the freezer while you prepare the rest of the ingredients.
You first want to start with mixing all of the dry ingredients together in a large mixing bowl, then mix all of the wet ingredients in a medium mixing bowl.


Using a pastry cutter, cut the butter into the dry ingredients until it resembles pea gravel. If you do not have a pastry cutter, you can use a cheese grater to grate the butter into the dry mix. If this is the case, do not cube the butter.


Add the wet ingredients into the dry ingredients. Add the cinnamon chips and fold everything together until just combined. It will look crumbly and there will be flour in the bottom of your bowl. This is ok! Work this flour into the dough.


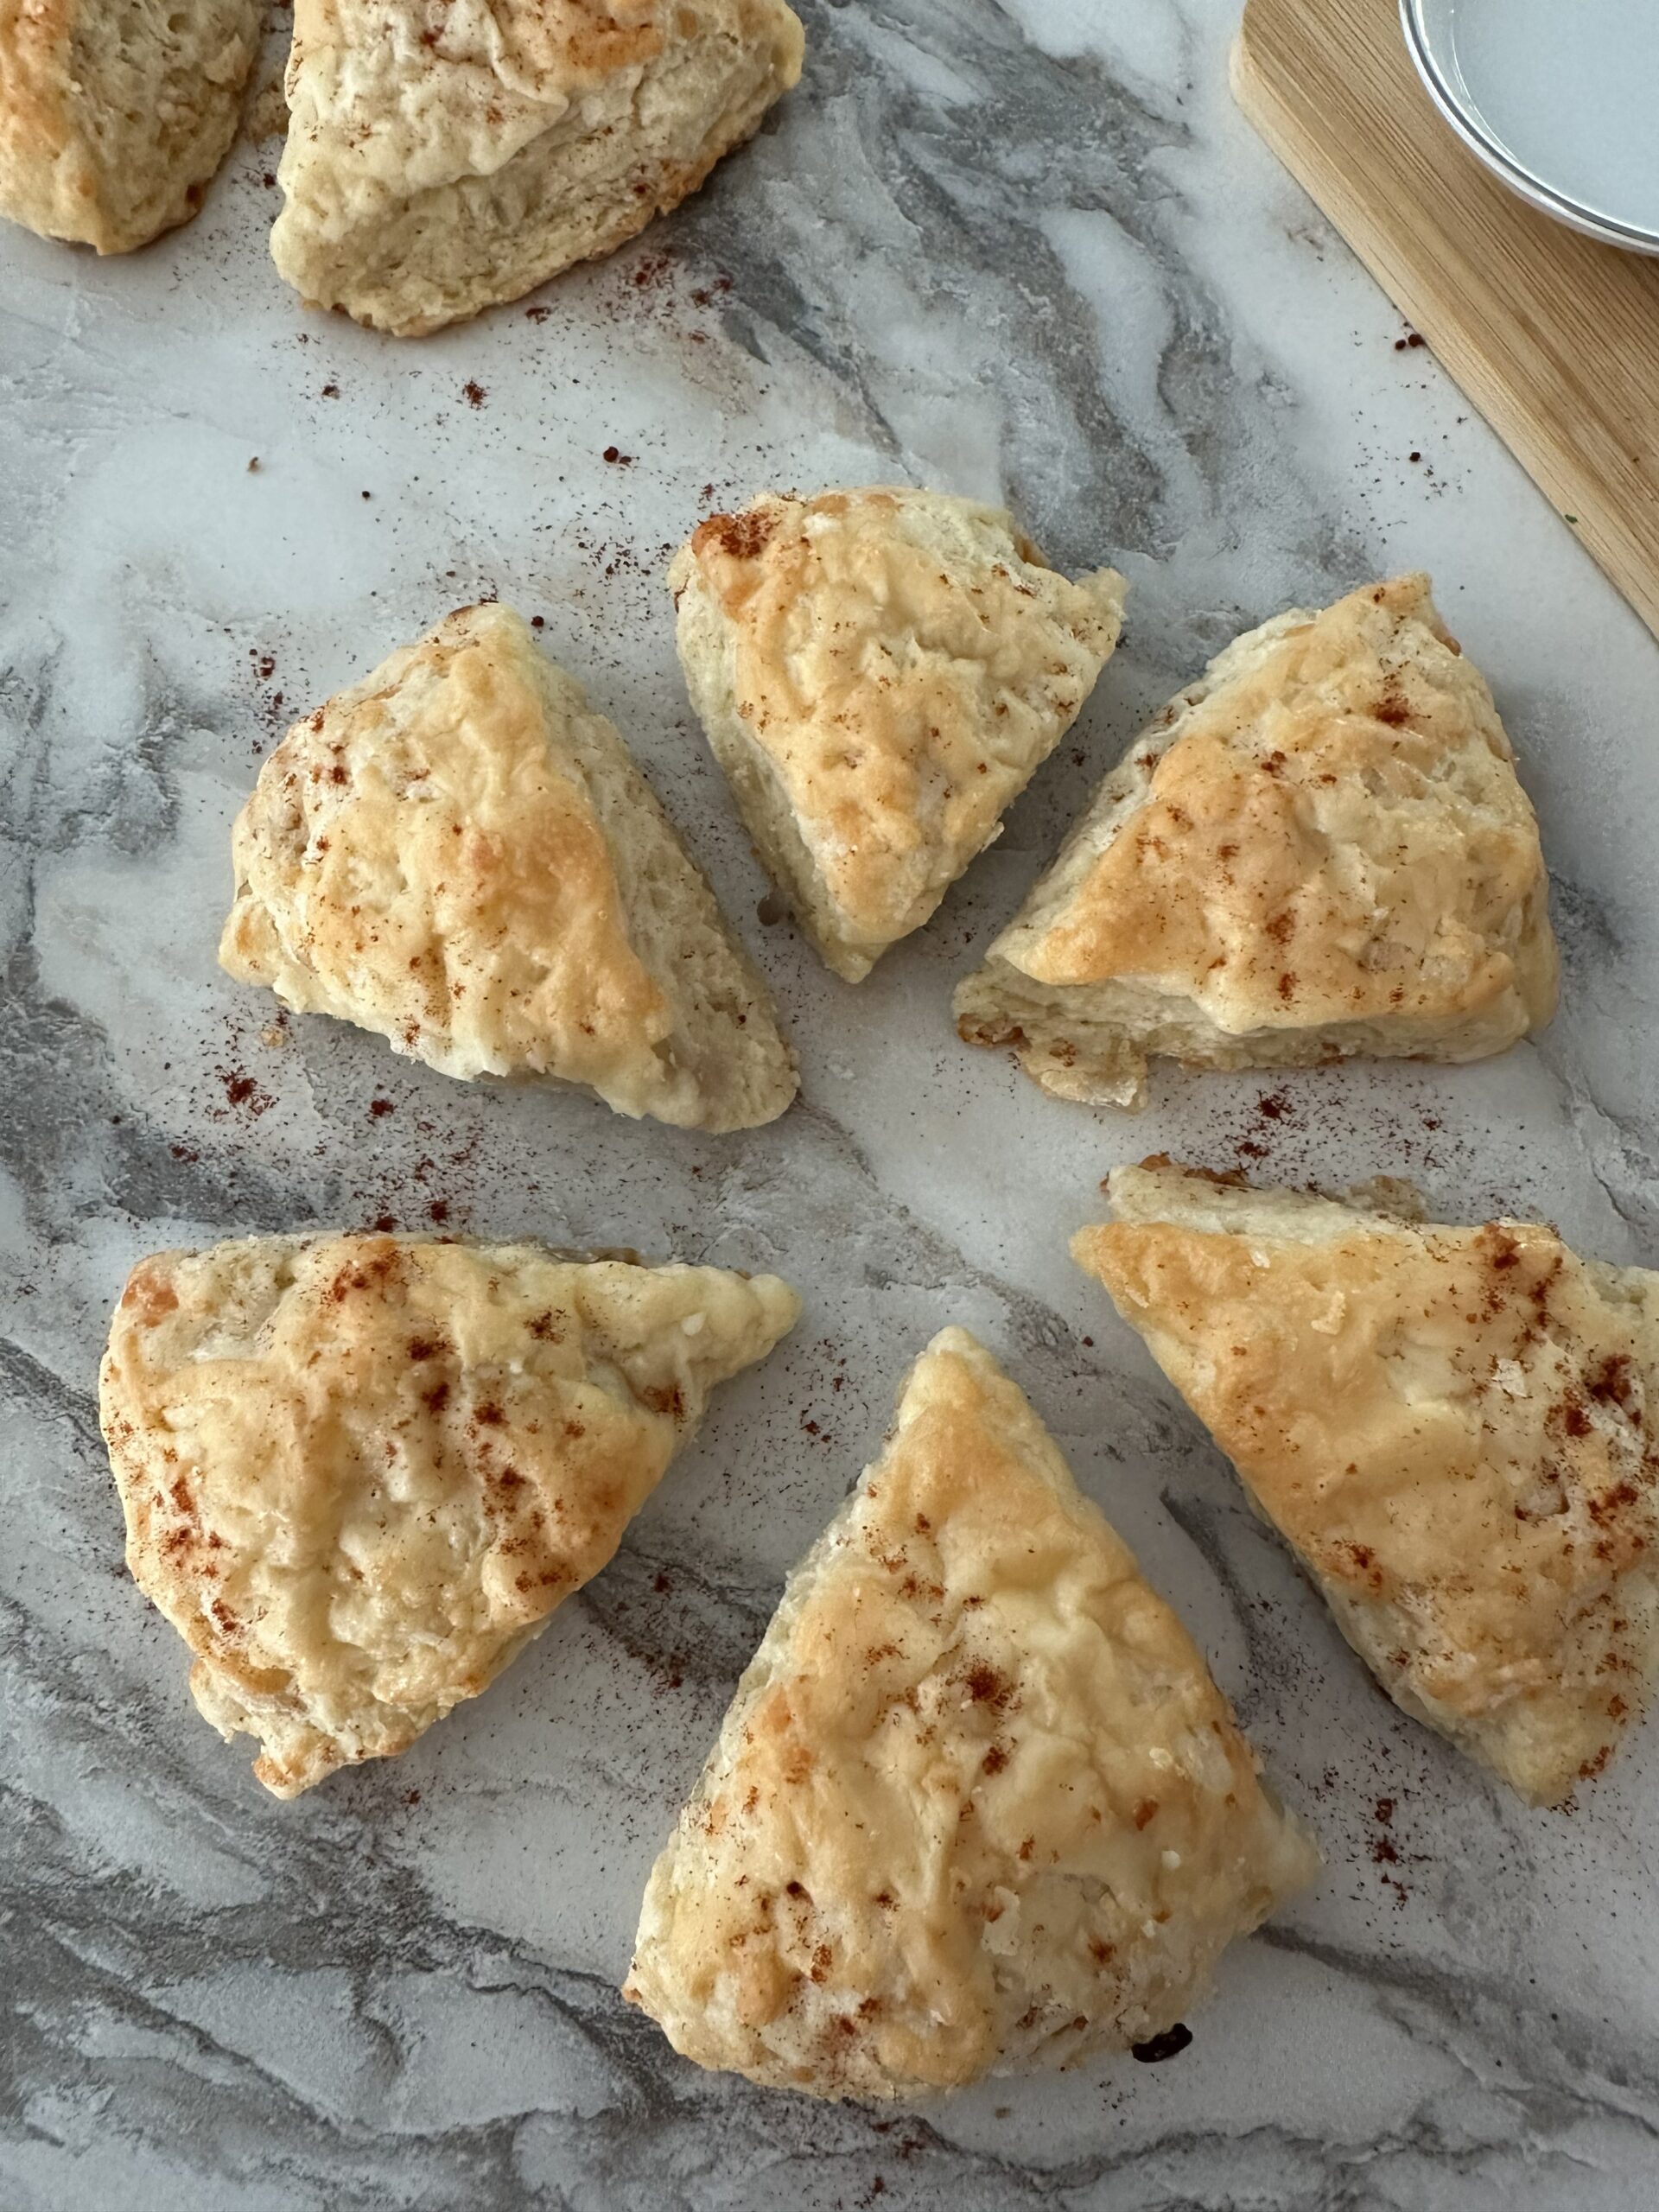
Form a dough ball and split it in half to form two dough balls. Flatten them into roughly 6 inch discs, 2 inches thick. Using a knife or the pastry cutter, cut the discs into 6 triangles. It’s ok if they aren’t exactly even, it makes them look ‘rustic’.


Pull the triangles about 1 inch apart from each other, bake at 400 F for 18 minutes, or until tops are golden brown. Before baking them, if you want, you can brush them with milk and sprinkle some coarse sugar on top. The milk helps them get that nice, golden color we’re looking for.
Drizzle with Vanilla Glaze and enjoy!

Why I love This Recipe
How do they taste? I love, love these scones! They have the perfect amount of cinnamon, and the cinnamon chips add just enough sweetness. And the vanilla glaze on top was the perfect finishing touch.
How do they smell? They smell amazing! You can smell the butter and cinnamon coming from the scones, it’s so good.
Are they easy to make? Scones are pretty easy to make, and these cinnamon ones are no different. You could easily make them in the morning for breakfast.
Would I make these again? 100% yes! These will definitely be made over and over again.
Other Scone Recipes to Try
Frequently Asked Questions
Store scones in an airtight container in the fridge for up to 5 days. They can also be stored in an airtight container on the countertop for up to 3 days.
These scones freeze perfectly. Make sure the scones are cooled down completely before freezing them. Wrap them individually in plastic wrap and then in tinfoil. Store them in a freezer safe bag in the freezer for up to 3 months.
You can also freeze these scones before baking them. Form the discs, then wrap individually in plastic wrap and then tinfoil. Store in a freezer safe bag in the freezer for up to 3 months.
These scones are perfect to be made ahead of time. Make them up until you form the discs, then wrap them individually in plastic wrap, then store in an airtight container until ready to use. If waiting longer than 48 hours to bake these, I recommend freezing them until you are ready to bake them, up to 3 months long.

Cinnamon Scones with Cinnamon Chips and Vanilla Glaze
Ingredients
- 2 1/4 cup all-purpose flour
- 8 tablespoons unsalted butter, very cold
- 1 egg
- 1/4 cup sugar
- 1 tablespoon baking powder
- 1/2 cup Greek yogurt
- 1/4 cup milk
- 1/2 cup cinnamon chips
- 1 teaspoon vanilla extract
- 1 teaspoon ground cloves
- 1/4 teaspoon salt
Vanilla-Orange Glaze
- 3/4 cup powdered sugar
- 1 tablespoon milk
- 2 teaspoons vanilla extract
Instructions
- Line a baking sheet with parchment paper or a silicone mat. Set aside.
- Cube the butter into small cubes and set in the freezer while you prepare the batter.
- Sift the dry ingredients together into a medium bowl: 2 1/4 cup flour; 1/4 cup sugar; 1/4 teaspoon salt; 1 tablespoon baking powder; and 1 teaspoon cloves. Set aside.
- Whisk the wet ingredients together: 1 large egg; 1 teaspoon vanilla extract; 1/2 cup yogurt; and 1/4 cup milk. Set aside.
- Using a pastry cutter, cut the butter cubes into the dry ingredients until the butter is roughly the size of pea gravel.
- Add the wet ingredients to the dry ingredients. Add the 1/2 cup of cinnamon chips. Gently fold over until everything is combined and the dough looks crumbly. You'll need to work the dough with your hands to be sure all of the flour is incorporated into the dough without overworking it. If the dough seems too dry, add a tiny amount of milk, no more than a tablespoon, and work that into the dough.
- Form a dough ball and split it into two halves. Form these halves into 6-inch discs, 2 inches thick. I like to use my hands to flatten the dough onto the prepared baking sheets. Using a bench scraper or a sharp knife, cut the discs into six roughly equal triangles. Mine aren't always the same size and I think it gives them a rustic look.
- To get crisper sides, pull the triangles about an inch apart from each other. If you want softer sides, leave them closer together.
- Once the scones are cut up, set them in the fridge for 20 minutes. Preheat the oven to 400 F. I like to use this waiting time to clean up.
- After 20 minutes, remove the scones from the fridge. If you would like to, you can brush the tops of the scones with milk and sprinkle with coarse sugar. This helps them get the nice golden hue we are looking for. Place them on the middle rack in the oven. Bake for 18-22 minutes, or until the tops are a nice golden brown. Let them rest for 10 minutes while you make the glaze. These scones are so delicious fresh out of the oven!
Vanilla Glaze
- In a small mixing bowl, add 3/4 a cup of powdered sugar; 1 tablespoon of milk; and 2 teaspoons of vanilla extract. Stir vigorously until a smooth glaze has formed. These scones are best enjoyed warm, but if you want the glaze to set, you'll have to let them sit for 10 minutes before adding the glaze. They are just delicious with glaze that isn't set though, but it may be easier to dip them into the glaze if they are really warm. You don't want all of your delicious glaze dripping off your warm scone.
Notes
- Be sure to use COLD butter. Put your butter in the freezer 30 minutes before making this recipe.
- Make sure your egg, milk/cream, and yogurt are cold as well.
- Store scones in an airtight container in the fridge for up to 5 days. These scones can also be stored in an airtight container on the countertop for 3 days.
- Scones can be frozen for up to 3 months. Be sure they are fully cooled down, then wrap individually in plastic wrap and then tinfoil. Store in an airtight container in the freezer. Can be frozen with or without the glaze on top.
- To make ahead, make the recipe up until you form the discs. Then wrap the discs in plastic wrap and store in the fridge overnight. Cut and bake the scones in the morning for a delicious, easy breakfast.