The Best Cheese and Bacon Scones
Did someone say bacon? Yes, that was me. These cheese and bacon scones are delicious and cheesey and wonderful. With the addition of green onion, it’s almost like you’re eating a baked potato in scone form.

Scones are quickly becoming one of my favorite things to make and eat. They really are not that difficult to make, and then you have a delicious, homemade treat perfect for breakfast or a snack. These scones are the perfect amount of cheesiness with the right amount of bacon and onion and butteriness. Don’t take my word for it, make some for yourself and you will see.
Ingredients
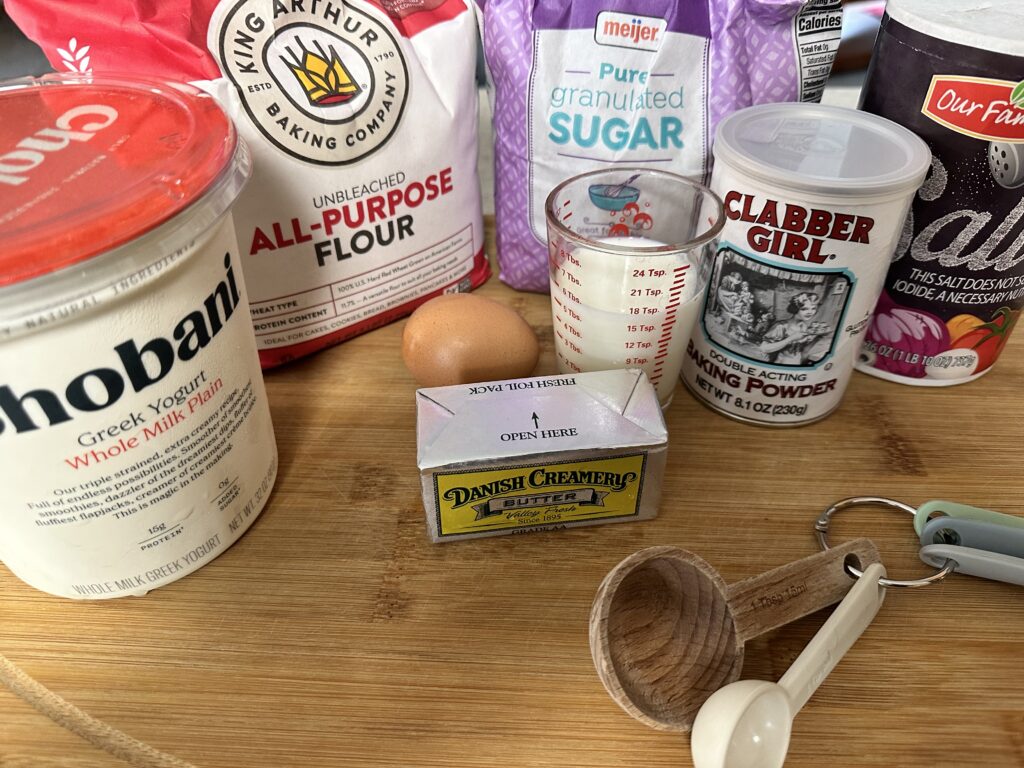

- Flour- all-purpose flour works best in this recipe.
- Butter- essential for flaky texture and deliciousness; must be COLD.
- Egg- provides structure for the scones.
- Baking Powder- provides lift; be sure it is not expired.
- Salt- enhances the flavors.
- Sugar-provides a little sweetness, only 1 tbsp used.
- Milk or cream- provides moisture.
- Greek yogurt- provides moisture and tanginess.
- Cheese- provides deliciousness! Buy block cheese and shred yourself for best results.
- Bacon!- yum! Either bake your own and crumble or buy crumbled from the store.
- Green Onions- I love the mild flavor of green onions.
Let’s Make This
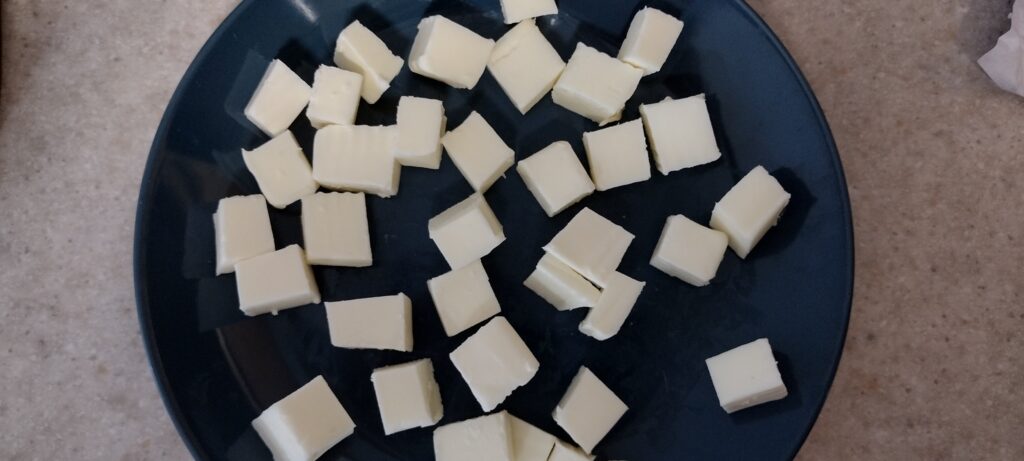
I put my butter in the freezer early in the day when I am going to make these scones. The butter must be very cold when you cut it into the flour mixture. The steam that is created from the cold butter melting when being baked is what provides the flaky layers for these scones. We love the flakiness so be sure your butter is cold.


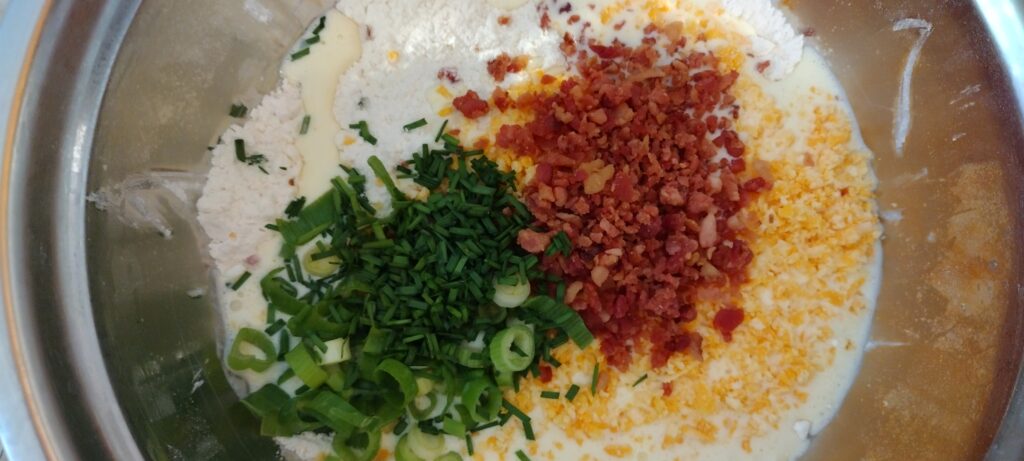
Once you have cut the butter into the flour mixture, you will add the wet ingredients in along with the cheese, bacon and green onion.

Next, you will want to split the dough ball in half and form the discs. You can either roll them out on a lightly floured work surface; or what I find easier is to just form them with my hands. If the dough is particularly wet and you find it sticking to your hands, just put a bit of flour on your hands while you are forming the disks and this will make them less sticky. I line two large baking pans with silicone liners, but you can use parchment paper as well.


I haven’t quite mastered cutting the scones out equally. I think it gives them character and a bit of a rustic look. It is said that you should brush your scones with milk before baking to help them get nice and golden. I tried this and I could not see much of a difference. Go ahead and try this if you would like, but I don’t think it is a crucial step in the scone making process.


These are so good straight out of the oven. They need a few minutes to cool down so when you bite into them, they’re not piping hot.
Recipe Notes
Tips
As mentioned before, the butter must be very COLD. If the butter is too warm, it will not provide enough lift to create the flaky layers that make scones so wonderful. I also put my pastry cutter into the fridge until its time to use it.
Scones must go in the fridge once they have been formed to chill the dough before baking.
Wait until the scones are chilling in the fridge before preheating the oven. Bonus: this gives you time to clean up while you are waiting for the oven to preheat.
Don’t overcook the scones, they will continue cooking for a bit once you pull them out of the oven.
If you want round biscuits, drop 2″ round dough balls onto your pan rather than forming discs and cutting into triangles.
If you want soft-sided scones, keep the scones close together while baking. For crispier sides, pull them about 1-2″ apart.
Storage Tips
For best results, store scones in airtight container in the fridge for up to four days.
Freezing Tips
These scones can be frozen before or after baking. If freezing before baking, cut scones into their shapes then place on sheet pan, cover in plastic wrap and freeze until solid. Place frozen scones in freezer safe bags. You may want to double up on freezer bags to prevent smells getting into the scones. They will last for up to three months in the freezer. When ready to bake, thaw overnight in the fridge, then cut into scones and bake as normal. You can also choose to bake them frozen. They would require a bit longer of a cook time, about 21 minutes or until they look just golden brown on the top.
After you have baked the scones, be sure they have cooled completely before freezing. Place in freezer safe bags and store in the freezer for up to three months. You may want to double up on freezer bags to prevent any smells from getting into your scones. When you want to enjoy a scone, thaw in fridge overnight and heat up a bit in the microwave, or enjoy in cold.
Related Recipes
Basic Vanilla Scone Recipe- this is a basic recipe from which you can use to make different flavored scones. If doing a savory recipe, you would omit the vanilla and only use 1 Tbsp of sugar. You may also want to try my savory Gruyere and Shallot Scones.

The Best Cheese and Bacon Scones
Ingredients
- 2 1/4 cup all-purpose flour
- 1 Tbsp sugar
- 1/4 tsp table salt
- 1 Tbsp baking powder
- 8 Tbsp cold butter, cubed
- 1 large egg
- 1/2 cup Greek yogurt
- 1/4 cup milk or cream
- 1/4 cub bacon crumbles
- 1/4 cup shredded cheese- any flavor
- 2 Tbsp green onions
Instructions
- Line a large baking pan with parchment paper or a silicone mat. Place pastry cutter in fridge.
- Cube cold butter into small pieces. Place in fridge.
- Mix dry ingredients together in large bowl: 2 1/4 c flour; 1/4 c sugar; 1/4 tsp salt; 1 Tbsp baking powder.
- Whisk the wet ingredients together: 1 egg; 1/2 c yogurt; 1/4 c milk.
- Remove butter from the fridge and add to the dry ingredients. Using pastry cutter, cut butter into flour mixture until butter is roughly the size of peas.
- Add the wet ingredients into the dry ingredients along with the 1/4 c bacon crumbles; 1/4 c shredded cheese; 2 tbsp green onions.
- Mix everything together until just combined into a dough ball. You may have to get in there with your hands to make sure everything is incorporated. Don't over-stir.
- Split the dough in half and form two 6-inch discs. You can either roll them out on a lightly floured work surface or form with your hands.
- Using the pastry cutter, cut the discs into six triangles. Pull the triangles about 1-2" apart for crispier edges. Keep them closer if you want soft edges.
- Place the pan in the fridge while you preheat the oven to 400 degrees. Use this time to clean up.
- Once oven is preheated, place scones inside and bake for 18 min, or until tops are just golden brown. You don't want to overcook the scones as they can become too dry. They will continue to cook for a bit once you pull them out of the oven.
- Let the scones cool for just a bit before enjoying. Warm scones are so delicious!


