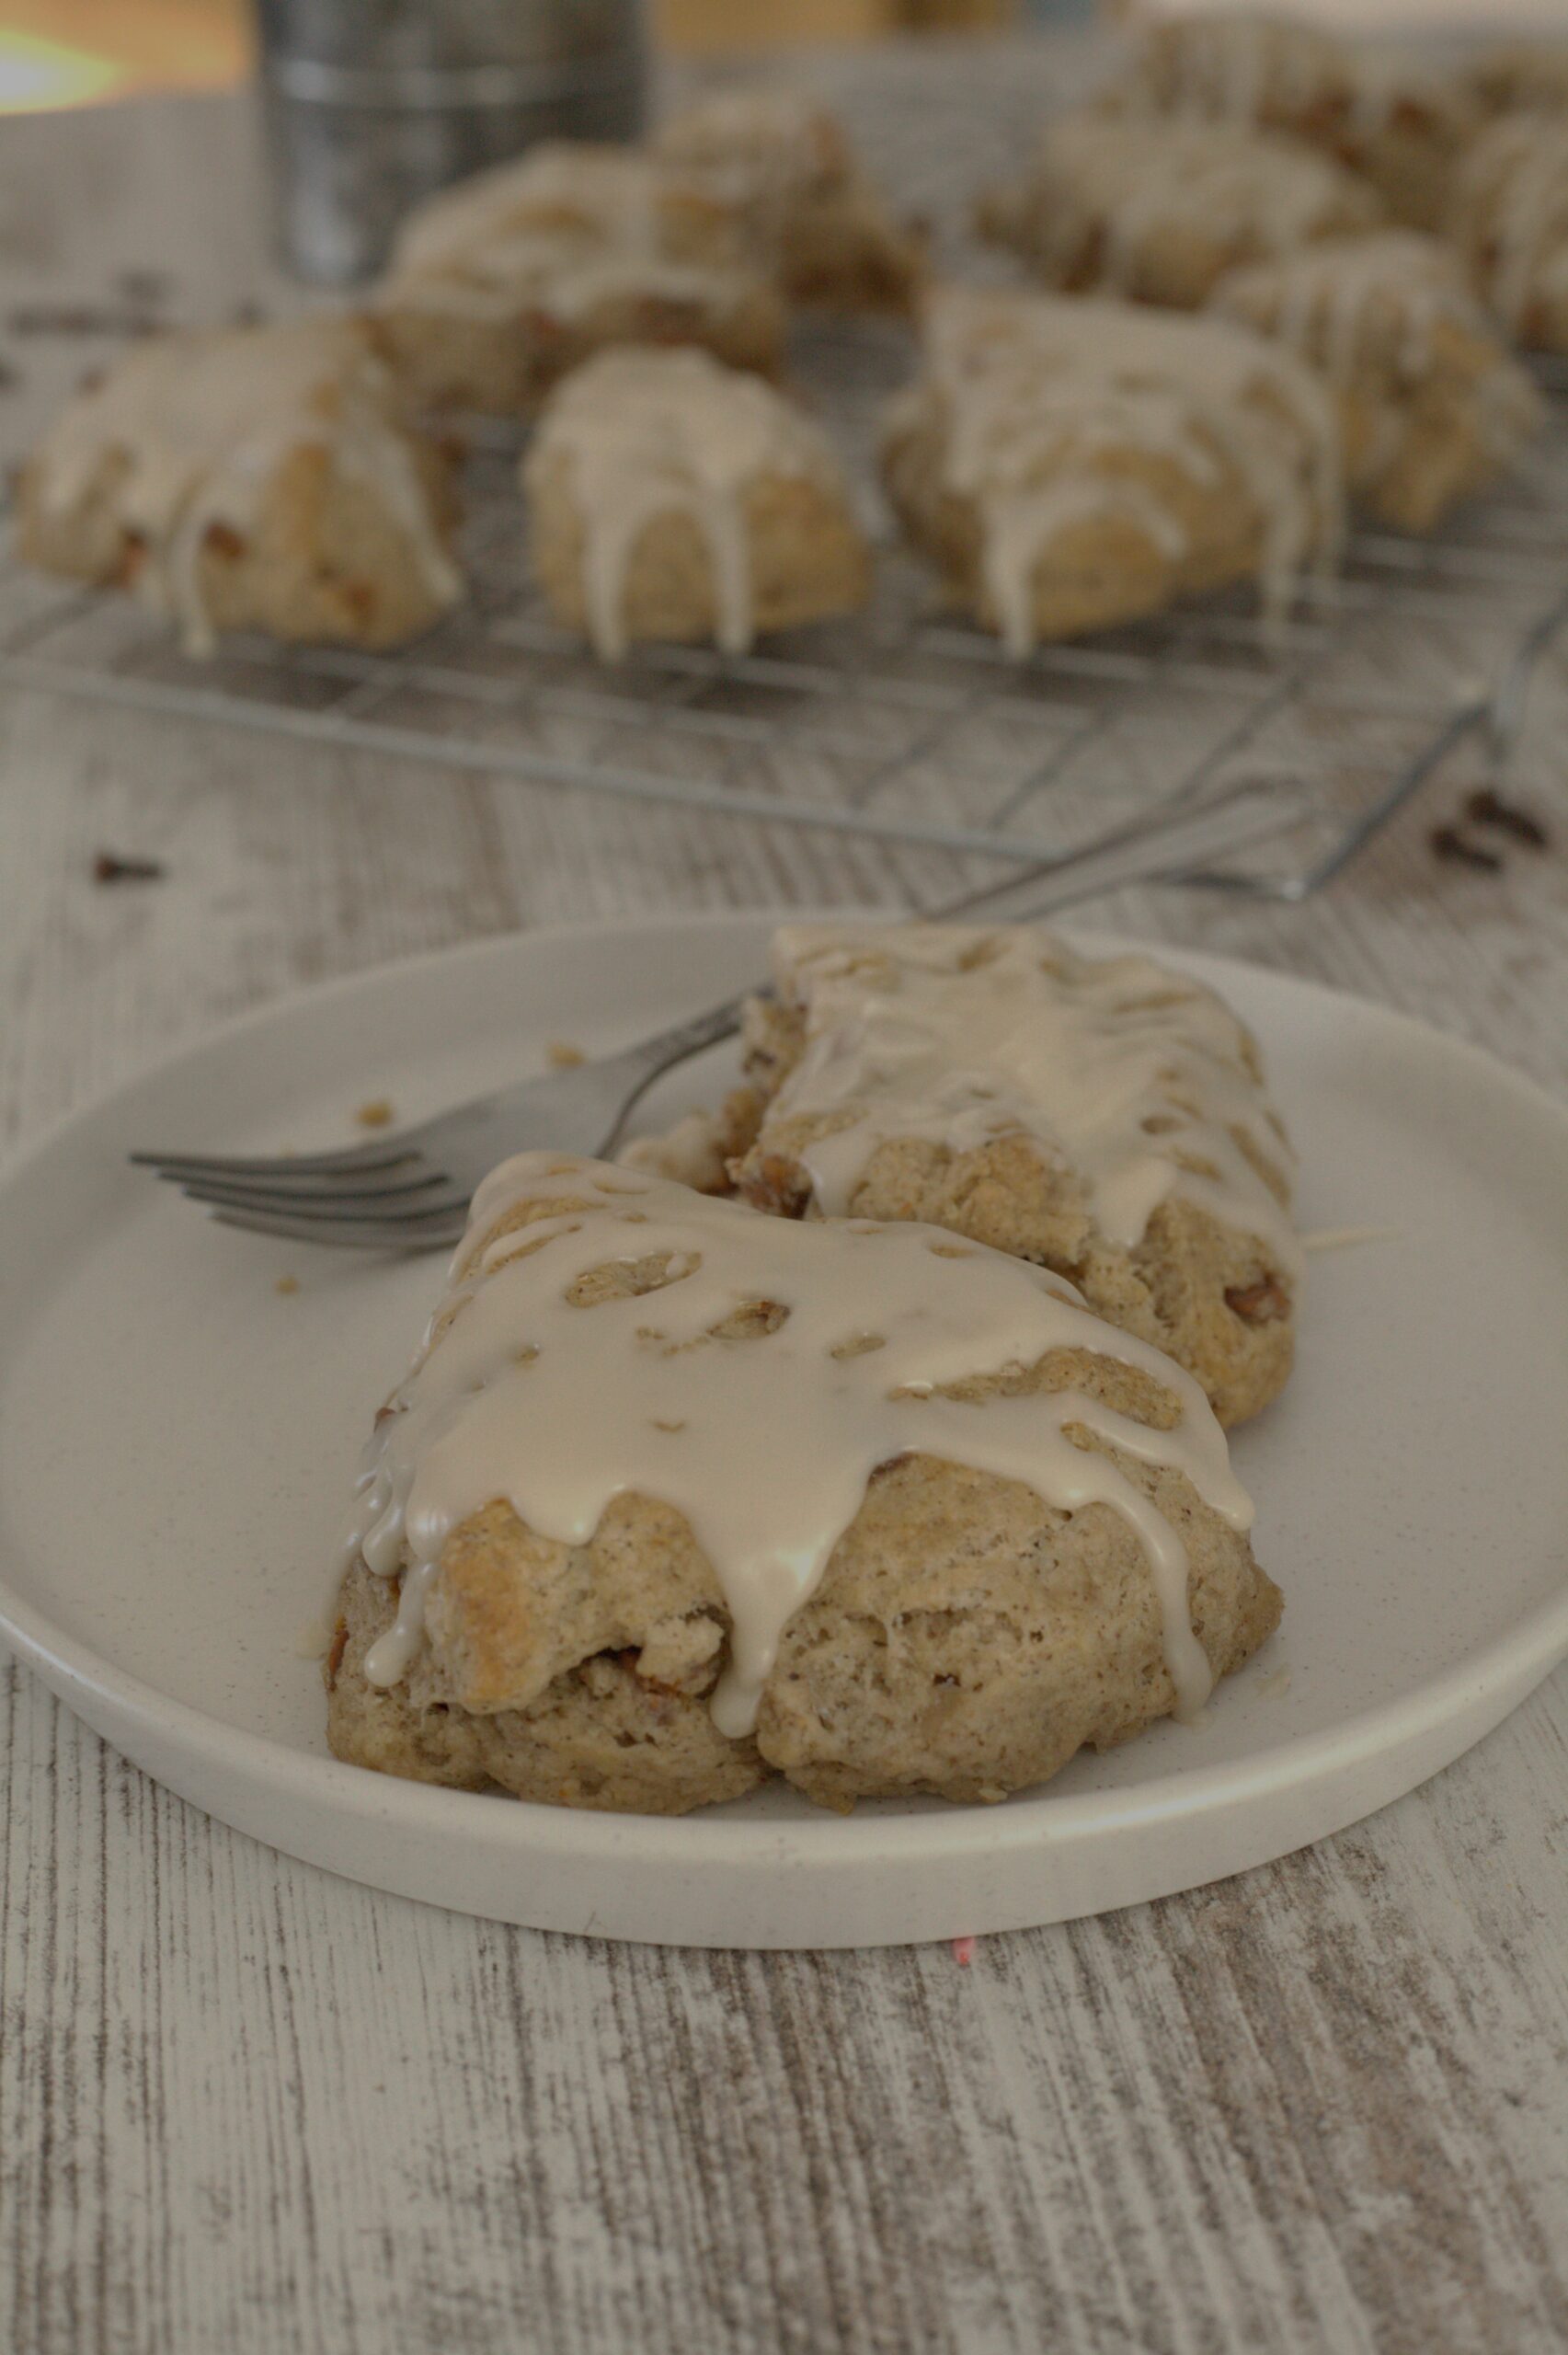
Manchego and Shallot Scones Recipe
These Manchego and shallot scones are buttery, savory, and packed full of nutty Manchego and lightly garlicky flavor I can’t resist. They bake up golden and crisp on the edges with a tender center that makes them just as good for brunch as they are for snacking straight off the pan.

Why I love this recipe
Taste Divinely cheesy. I love the melted cheese on the top when they’re fresh from the oven. And the mix of cheese and shallots throughout? Couldn’t be better!
Smell These scones are worth making for the smell alone. The mild nutty scent of the Manchego cheese will have you waiting by the oven until they are done.
Ease of making These scones, all scones really, are super simple to make. That’s why I love them. Simple and easy, the perfect combination.
Would I make these again? Absolutely! Buttery and cheesy? What’s not to love!
I absolutely love Manchego cheese! That nutty, buttery flavor, the slight sharpness, the mild sweetness of shallots, and just fancy enough without trying too hard. There’s something irresistible about a savory scone, and these Manchego scones are exactly that-golden, buttery, and full of that delicious Manchego flavor.
They come together quickly, bake up beautifully crisp on the outside, and stay tender inside. I love them for brunch because they feel a little special without all the extra work.
Make it brunch
These Manchego and shallot scones pair surprisingly well with bold, vibrant sides. Try them with my crisp arugula salad for something fresh, or lean into salty-sweet contrast with my Cuban tostones or sweet plantain fritters. For a heartier brunch plate, they’re fantastic alongside my congri or even my quinoa lentil salad. Manchego’s nutty richness handles big flavors effortlessly.
Ingredients
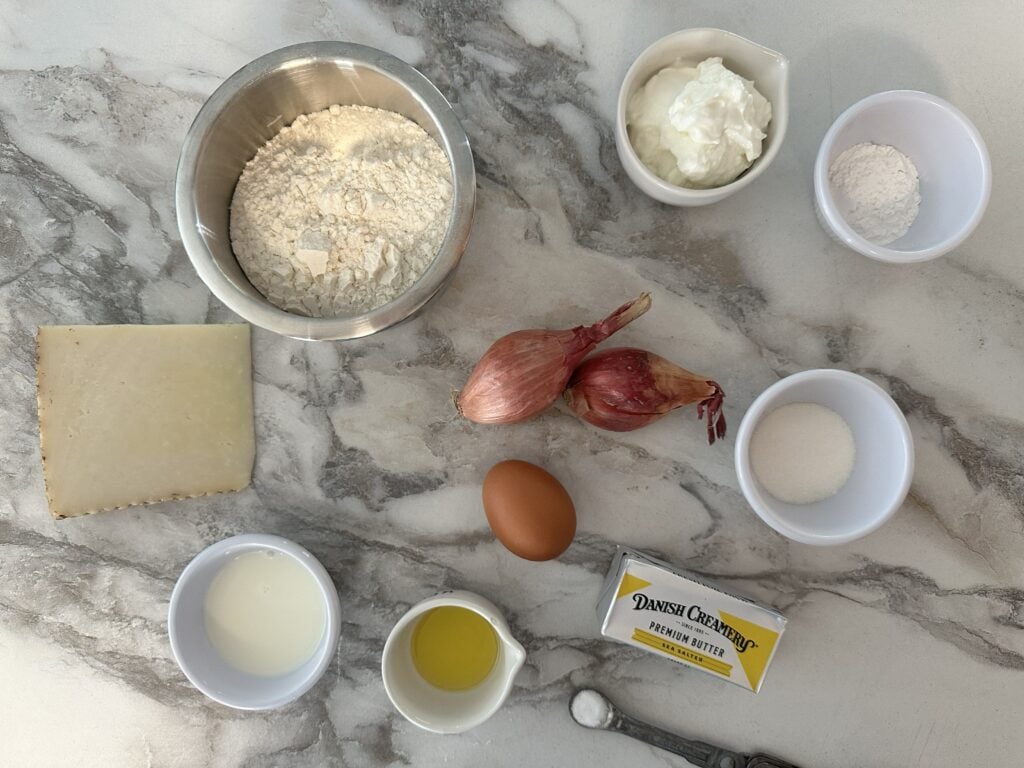
Most of the ingredients for these scones are pantry staples-flour, sugar, butter, baking powder, and a few others you probably have on hand. But there are a few key ingredients that really make these scones shine.
- Manchego cheese The star of the show. My favorite cheese. The creamy, nutty, and lightly sharp flavor is just the best, IMHO. Great on crackers, salad, plain, and definitely in these scones.
- Shallots I love shallots! Their flavor is a mix of onion and garlic, and they’re sweeter with less sharpness. They are fantastic sauteed or raw.
Recipe tips
How to make Manchego scones
One thing I love about scones is how easy they are to make — and these are no exception. They come together quickly, with just a brief 20-minute chill time (perfect for cleaning up while you wait).
Cube the butter and set it in the freezer while you prepare the dry ingredients.
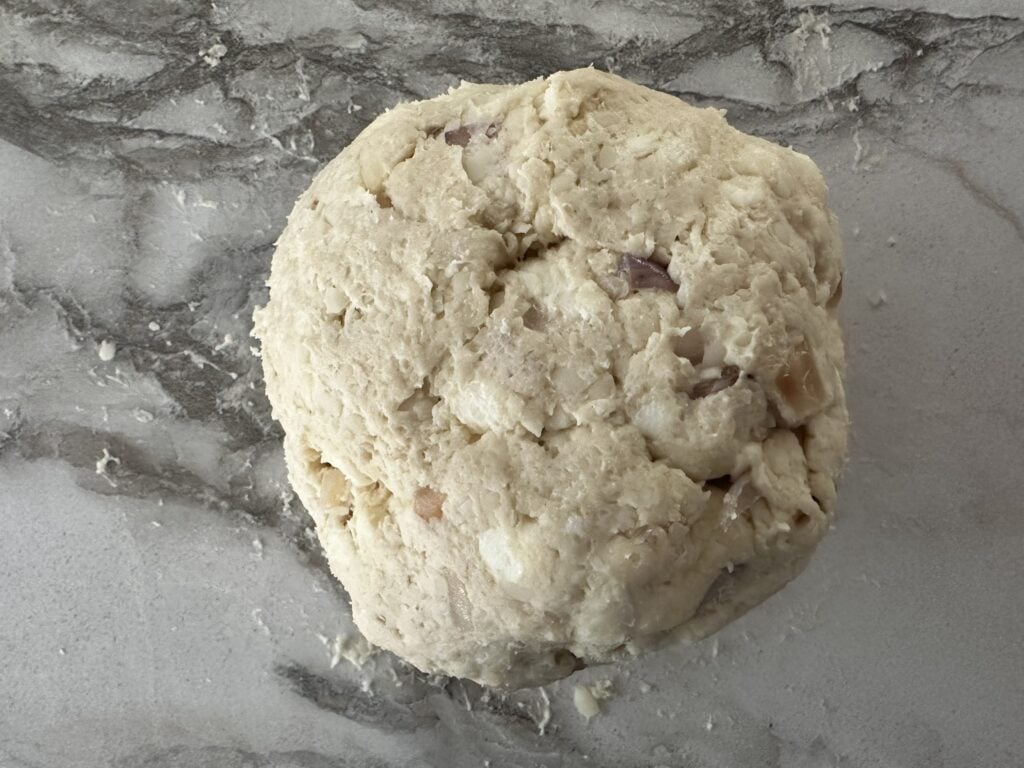
Start by whisking the dry ingredients together, then mix the wet ingredients in a separate bowl. Cut the butter into the dry ingredients with a pastry cutter until it resembles coarse crumbs, then pour in the wet ingredients and add the shredded Manchego. Stir until a shaggy dough forms.


Work the dough into a ball, then do a quick lamination process by flattening the dough, folding it in half twice, and repeating the process two more times. This will help us get those nice, flaky layers and help the scones rise tall in the oven.


Form the dough into a ball again and divide it in half.

Shape each half into a 6-inch disc on a parchment- or silicone-lined baking sheet. Slice each disc into six wedges and separate them slightly so they have room to bake up beautifully. Freeze the scones for 20 minutes while the oven preheats, then bake for about 20 minutes.


When the scones come out of the oven, they should be puffed, golden at the edges, and smelling incredible. The cheese will create little bubbly, caramelized spots across the top, and they will smell so divine! Let them cool on the pan for a few minutes before moving them to a cooling rack-this will help the crumb finish setting while keeping the edges crisp.

More fall scones to try
FAQs
Store scones in an airtight container in the fridge for up to 5 days. They can also be stored in an airtight container on the counter for 3 days.
Yes, they freeze great. Make the recipe up until the point where you flatten the discs. Wrap the discs in plastic wrap and tinfoil, then add to a freezer safe container and freeze for up to 3 months. Likewise, you can freeze the scones after you have cut them into triangles. Lay them flat on a tray and freeze them solid. Then, add them to a freezer safe container and freeze for 3 months, to be used when you only feel like baking one scone.
COLD butter! The milk/cream and yogurt should be cold as well. When the cold ingredients hit the oven, they release steam as they bake, helping to create those flaky layers. It’s also important not to overmix the dough. Mix it just until it comes together. We only want to handle it just as much as we need to. Remember to chill scones after forming them and before baking them. This ensures the butter is cold when it goes into the oven.
Did you make this recipe? I’d love to hear about it! I’d also love it if you left me a review and a star rating. Happy baking!

Ingredients
- 8 tablespoons butter, unsalted
- 2 1/2 cups all-purpose flour
- 1 tablespoon sugar
- 1 egg
- 1 tablespoon baking powder
- 1/2 cup yogurt
- 1/4 cup milk/cream
- 1/8 teaspoon salt
- 1 cup Manchego cheese
Instructions
- Line a baking sheet with a silicone mat or parchment paper.
- Cube the butter (8 tablespoons) into small cubes and place in the freezer while you prepare the rest of the ingredients. Shred the cheese.
- Whisk the dry ingredients together in a large mixing bowl. (2 1/2 cup flour, 1 tablespoon sugar, 1/4 teaspoon salt, and 1 tablespoon baking powder)
- Whisk the wet ingredients together in a separate smaller bowl. (1 large egg, 1/2 cup Greek yogurt, 1/4 cup cream)
- Cut the butter into the dry ingredients using a pastry cutter or two forks until it resembles pea gravel. Fold the wet ingredients and cheese (reserve 1/4 cup of the cheese) into the dry ingredients. Once the dough starts to come together, get in there with your hands and form a dough ball. If it seems a bit dry, add 1-2 teaspoons of milk.
- I do a simple lamination for these scones. Flatten the dough ball with your hands into a rough rectangle. Fold in half, flatten again, and repeat the process twice, then split the dough in half and form two dough balls.
- Flatten each dough ball into a six-inch disc onto your prepared baking sheet. Cut each disc into six roughly equal pieces and pull each triangle an inch apart. Set the tray in the fridge for 20 minutes. Preheat the oven to 400 Fahrenheit.
- After 20 minutes, take the tray out of the fridge. Brush the scones with a bit of cream and sprinkle with the remaining cheese. Bake for 20 minutes or until scones are browned on the tops slightly and have risen tall. Remove from the oven and let rest for 10 minutes before enjoying them. These scones are delicious fresh out of the oven!
Notes
- Store scones in an airtight container in the fridge for up to 5 days, or in a container on the counter for 3 days.
- If using salted butter, omit the salt from the recipe.
- To freeze scones, wait until the scones are cooled down completely. Wrap them in plastic wrap, then foil, and store them in a freezer-safe container for up to 3 months.
- To freeze before baking, make the scones all the way through slicing the scones. Freeze flat on a tray, then wrap individually in plastic wrap and tinfoil and store in a freezer-safe container. Freeze for up to 3 months. If you want to freeze the discs, wrap them in plastic wrap then tinfoil before freezing as well. Thaw out overnight in the fridge before slicing into triangles. When you’re ready to bake them, if baking from frozen, bake at the regular temperature and add 1-2 minutes to the baking time. You can also thaw them out in the fridge overnight and bake at the regular time and temperature.