Easy Homemade Cuban Bread (Pan Cubano)
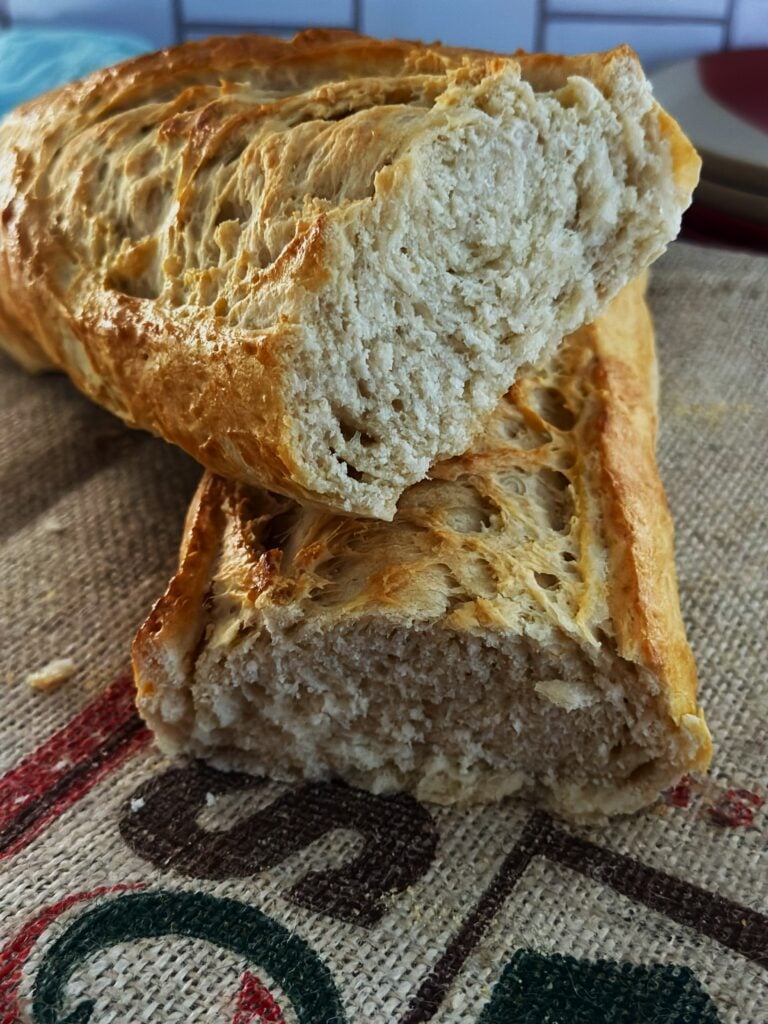
Fresh-baked Cuban bread is one of life’s simple pleasures. Soft on the inside with a thin, crisp crust, it’s perfect for slathering with butter that melts into the warm bread, and it’s the best sandwich bread for the Cubano. The best part? This bread is far easier to make at home than you might think- and once you try it, you’ll be hooked.
There is a definite feeling of accomplishment when you make fresh-baked bread. Just going through the motions of the mixing, the rolling, the waiting, has such a calming effect. Plus, the smell of bread baking in the oven. There is nothing better. Just a few simple ingredients and a few hours of mostly hands-off time are all you need to make easy Cuban bread at home. It’s soooo good warm out of the oven, slathered with butter, and also on the side of my Arugula Salad with Feta.
Make It Brunch
Cuban bread is the perfect bread to serve for brunch. Pair it with my Easy Roasted Garlic Artichoke Dip or my Easy Whipped Feta Dip. For a delicious Cuban brunch spread, add Tostones and Guava and Cheese Pastries. You could also prepare an amazing holiday sandwich spread using fresh-baked Cuban bread.
A Bit of History
It is said that the first commercial bakery to produce Cuban bread is La Joven Francesca bakery in Ybor City, established in 1896. Bread was sold for 3 to 5 cents, and delivered daily to your house. Can you imagine getting freshly-baked bread delivered to your house? That would be wonderful! This bread is so delicious on it’s own, but is probably most known for it’s use in the amazing Cuban Sandwich, or Cubano.
Ingredients

Cuban bread calls for simple ingredients that you probably already have in your pantry.
- Flour Regular all-purpose flour works in this recipe
- Lard Rendered pork fat
- Sugar
- Salt
- Yeast Quick Rise is the best option
- Water
Ingredient Note: Traditional Cuban bread gets its signature softness from lard. I like to use saved bacon drippings instead — it gives great flavor and saves you from buying a whole block of lard you might not use up. If you prefer, vegetable shortening works too, but lard is what makes the bread truly authentic.
Why I Love This Recipe
How does it taste? It’s so delicious! Hands down, one of the best breads and so easy to make.
How does it smell? Amazing! Doesn’t all bread smell amazing when cooking? That’s more a fact than a question.
Is it easy to make? It is pretty easy to make. I believe anyone could make this if they give it a chance. You won’t regret it!
Would I make it again? Yes, absolutely.
A Quick Overview of Making Cuban Bread
Authentic Cuban bread is easier to make at home than you would think. First, prepare the yeast mixture and set it aside. Once it’s ready- it will look foamy and smell slightly yeasty- you’ll add it to a stand mixer (fitted with a dough hook) with some of the flour and salt. Mix until combined.


Next, slowly pour in the melted lard, alternating with the remaining flour. Continue mixing until the dough just cleans the sides of the bowl and forms a soft ball.
This bread needs two rises:
- The first rise happens after mixing.
- The second rise happens after shaping the dough into a loaf.
To get a proper loaf shape, roll the dough tightly, starting at one end and working your way evenly down the entire length.


Once the second rise is done, make a shallow cut down the center of the bread, two inches from either end. Then it’s ready to bake at 450°F for about 20 minutes.
Pro Tip: Place a shallow pan of water on the bottom rack of the oven while baking. The steam creates a crusty exterior and keeps the inside soft and fluffy.
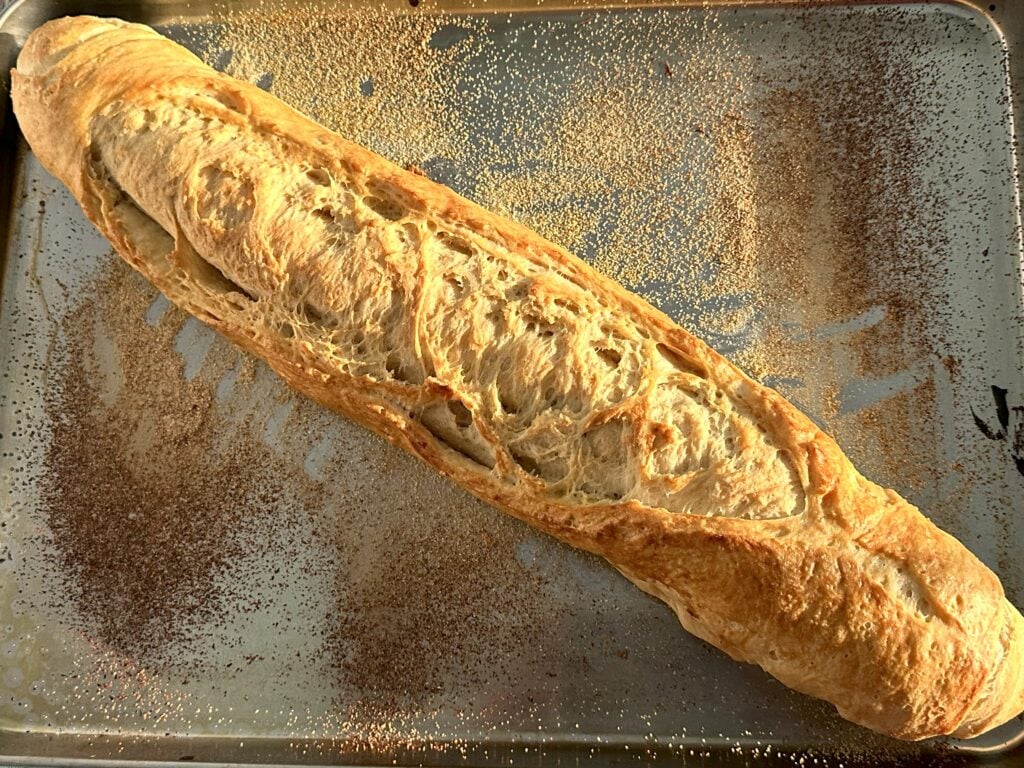
Special Note: I made the mistake of scoring my loaf right after rolling it up — before the second rise. The cuts opened too much during proofing, giving the bread a more rustic look. I actually love that style, but for the traditional Cuban bread appearance, wait until after the second rise to score. Use a sharp razor or knife and make one shallow slash down the center just before baking. This way the bread opens beautifully in the oven, right where you want it to.
Other Recipes to Try
- This bread is perfect for eating on its own, with soup, like my Lentil Soup or White Chicken Chili, but mostly it is the best bread for the Cubano.
- You might also enjoy my Tres Leches cake after you’ve had a delicious Cuban sandwich.
- And don’t forget my Cuban Black Beans and Rice!
Frequently Asked Questions
Store in an airtight container in the refrigerator for up to two days. For freshest results, consume within two days of baking. Don’t worry, this won’t be hard to do.
Yes, you can freeze it, either before you have baked it, or after. To freeze before baking, complete recipe through step six, then form the dough into a ball and wrap in plastic wrap. You may need to dust the dough ball with a bit of flour before wrapping in plastic. Put the wrapped dough in a freezer bag and freeze for up to three months. When you are ready to bake it, thaw it out in the refrigerator overnight, and continue on with step seven.
You can also freeze it after you have baked it. Let the bread cool down first, then wrap in plastic wrap and put in a freezer safe bag. Freeze for up to three months. Thaw it out in the fridge about a day before you want to use it. If desired, warm it in the oven at 350 degrees for 5-10 minutes.
Cuban bread is made with lard, while a baguette is not. Also, Cuban bread traditionally has a palm front placed down the center of it rather than being slashed down the middle. Since many of us do not have access to a palm frond, we slash it down the middle lengthwise instead.
Yes, you do. This is what gives the bread it’s softness and flavor. Shortening makes the bread dense, which is not what Cuban bread is. Use lard, you won’t regret it.
If you love this recipe, leave me a comment and consider signing up for my email list.
Pan Cubano (Cuban Bread)
Ingredients
- 3.5 cups all-purpose flour
- 3 tbsp lard, melted
- 1 tsp salt
- 2 tsp sugar
- 1 package instant yeast
- 3/4 cup lukewarm water
- 2 tbsp olive oil
Instructions
- In a small, glass measuring cup, add the yeast, 2 teaspoons sugar, and 1/4 cup of water (110 F). Stir and set aside.
- Oil a large mixing bowl with 2 tablespoons olive oil and set aside. Oil and dust with cornmeal a large sheet pan.
- In a stand mixer with the dough hook attached, add 2 cups of flour, 1 teaspoon salt and the yeast mixture. Mix on medium speed for 30 seconds.
- Melt 3 tablespoons of lard in the microwave. This should take between 30-60 seconds. Watch closely so it doesn't explode all over your microwave.
- On medium speed, add about 1.5 cups of flour alternatively with the lard. Add the rest of the water. Scrape the sides of the bowl down with a spatula as you go.
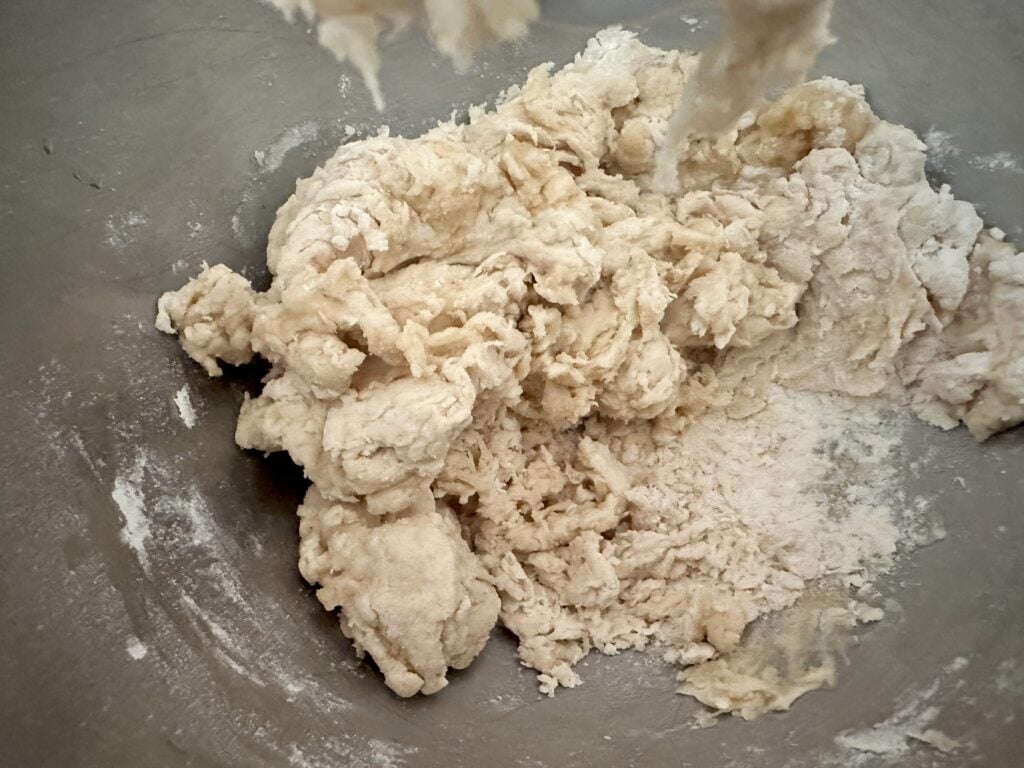
- Once the dough just cleans the sides of the mixing bowl, it is ready. It will look shaggy and be a bit sticky. This is ok. You may need to flour your hands a bit as you shape the dough into a ball. Once you have done this, add the dough ball to the oiled bowl, cover with a towel and set in a warm place to rise. You can preheat your oven to 160, turn it off and set your bowl in there to rise for 45 minutes.
- On a floured work surface, with a floured rolling pin, roll out the dough into a large rectangle. It will be roughly the size of a pie crust when it is rolled out, but in a rectangular form. If its not a perfect rectangle, that's ok.
- Once the dough is rolled out, you will roll it up tightly starting at the long side of the dough. When you are done rolling it up, use some water to help glue the seam shut. Taper the edges of the rolled up dough. I just pinched the edges closed a bit to make them rounder.
- On a large sheet pan that has been oiled and dusted with cornmeal, place the dough seam side down, diagonally. Cover loosely with plastic wrap. Set on warmed oven to rise for 45 minutes.
- Before dough has risen all the way, preheat oven to 450. Place a bowl of water on the bottom rack of oven. The steam from the water will help the dough crisp up on the outside yet stay soft on the inside.
- Once dough has risen, remove plastic wrap and make a shallow cut the length of the bread, starting two inches from one end and ending two inches from the other end. Bake for 20 minutes.
- Be sure to enjoy at least one slice of bread straight from the oven. It is so delicious when it is hot out of the oven, especially slathered in butter or honey or jam. So good!
Notes
- Be sure to use lard in this recipe.
- Store in an airtight container in the fridge for up to two days.
- Freeze for up to three months, stored in an airtight, freezer-safe container. After first rise, form dough ball and wrap in plastic before putting it into freezer safe bag. Thaw out in the fridge overnight when ready to bake, starting with the instructions right after forming the dough ball (Step 7).


This is my go-to recipe when I want fresh, homemade Cuban bread. It does take a bit of time, but the result is so worth it! Light, fluffy, and perfect for sandwiches or just with butter.